


Dana 60 Ball Joint Eliminator Upper 1992 - 2004 Ford F-250 F-350
Product Details:
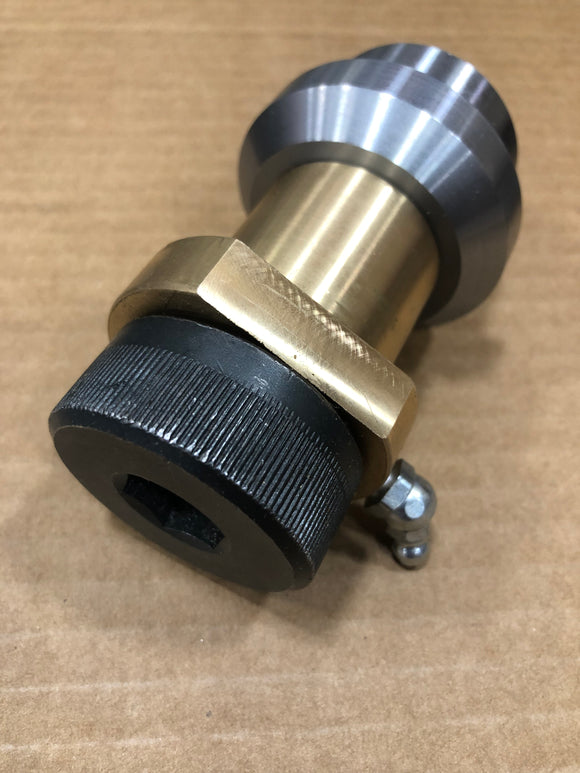
- Dana 60 ball joint eliminator
- Greaseable
- Massive 1.250" shoulder bolt!
- 7/8"-9 thread
- Requires a 5/8" hex allen socket 1/2" drive for installation
- Bronze bushing
- Requires welding
- Off-road use only
- No camber or caster adjustment (set at 0 degrees)
- Will ship USPS (if the shipping charge is too much we will do a return for the shipping difference once shipped)
- (2) kits required per axle
- Made in the U.S.A.!!!
- If you need lower ball joints: xrf-k8607t
Parts Included:
- (1) upper bronze bushing
- (1) upper weld on slug (threaded)
- (1) shoulder bolt
Fits:
- 1992 - 1997 Ford F-350 with the Dana 60 front axle
- 1999 - 2004 Ford Super Duty F-350 with the Dana 60 front axle
- 1999 - 2004 Ford Super Duty F-250 and Excursion with the Dana 50 front axle
- 1994 - 1999 Dodge Ram 2500 and 3500 with the Dana 60 front axle (ball joint studs face UP!!!)
Part Number:
- Ball Joint Eliminator BJED601992250-1
Warranty:
- 6 month warranty and case by case basis.
Installation Instructions:
- Knuckles MUST have proper preparation with all rust and contaminants removed. Flap discs seem to do a decent job for us for finish cleaning.
- Preheat the knuckle to 400°F and hold at that temperature at least 10 minutes. If using torches do not concentrate the heat in one spot too much.
- While the knuckle is still at the 400°F insert the threaded steel slug from the top side of the knuckle and make sure it's retained fully seated.
- Weld the top perimeter of the slug to the knuckle.
- Weld the bottom perimeter of the slug to the knuckle.
- Post heat/maintain to 400°F for at least 5 minutes.
- We typically peen the welded area at this point. Some do this and some do not.
- Thoroughly wrap the knuckle in moving blankets or insultation to slow the cooling process down to help prevent cracking. Another common method is burying them in cat litter or "speedy dry".
- Prep and paint/coating the knuckles as desired.
- Install the lower ball joint in the knuckle.
- Install the knuckle on the axle inner C and tighten the lower ball joint to 150 ft*lb.
- Push the bronze piece into the inner C and align the flat with the machined flat on the inner C.
- Make sure the welded in slug is PERFECTLY clean on the ID of any welding splatter, dust, dirt, debris, etc. If you don't the shoulder bolt WILL gall into the slug and it will be "game over".
- Lubricate the shoulder bolt and counterbore with grease (keep the threads clean of any lube!!!), apply Loctite 263 to the threads, and install it.
- Torque the top shoulder bolt to 200 ft*lb.
Terms and Conditions Disclaimer:
- For Off-Road Use Only All Ball Joint eliminators products, are sold for off-road use only. All performance modifications and installations are at the customers own risk. Ball Joint Eliminators holds no responsibility either implied or otherwise for mechanical, electrical or other failure when using any aftermarket performance products. Items sold for off-road use only are illegal in many states and provinces and are intended for racing vehicles which may never be used on a public road. By purchasing any aftermarket performance product, the customer takes full responsibility for any use, and/or misuse of the product and agrees that Ball Joint Eliminators holds no responsibility for any consequences, legal, or other, of such use and/or misuse.
 WARNING: This product can expose you to chemicals, which are known to the State of California to cause cancer and birth defects or other reproductive harm. For more information go to www.P65Warnings.ca.gov.